Linux VPS 全自动一键网络重装脚本AWS、甲骨文(一键DD脚本)
Linux VPS 一键自动DD安装Windows/CentOS/Debian
本脚本支持 AWS服务器 甲骨文 DD系统
之前写了一篇《萌咖一键DD纯净系统脚本(2021年8月最新版) CentOS/Debian/Ubuntu》,部分网友反馈,同样的情况下,有的人D成功了,有人却失败失联。诚然,萌咖的脚本在一些机型上确实存在不稳定的现象,但也存在一些网友命令写出错的情况。但不管怎么说萌咖脚本相对而言是比较好用的DD脚本。
今天给大家再介绍个DD脚本,这个脚本也是基于萌咖脚本优化、开发的。但是DD过程基本上不需要自己编写,完全傻瓜式,可能更适合“小白”网友。
更新说明:
20220703:新增自定义SSH端口(9-16)
安装重装系统的前提组件:
Debian/Ubuntu:
apt-get install -y xz-utils openssl gawk file wget screen && screen -S osRedHat/CentOS:
yum install -y xz openssl gawk file glibc-common wget screen && screen -S os如果出现异常,请刷新Mirrors缓存或更换镜像源。
RedHat/CentOS:
yum makecache && yum update -yDebian/Ubuntu:
apt update -y && apt dist-upgrade -yDD 命令:
wget --no-check-certificate -O NewReinstall.sh https://git.io/newbetags && chmod a+x NewReinstall.sh && bash NewReinstall.sh如为CN主机(部分主机商已不能使用),可能出现报错或不能下载脚本的问题,可执行以下命令开始安装.
wget --no-check-certificate -O NewReinstall.sh https://cdn.jsdelivr.us/gh/fcurrk/reinstall@master/NewReinstall.sh && bash NewReinstall.sh
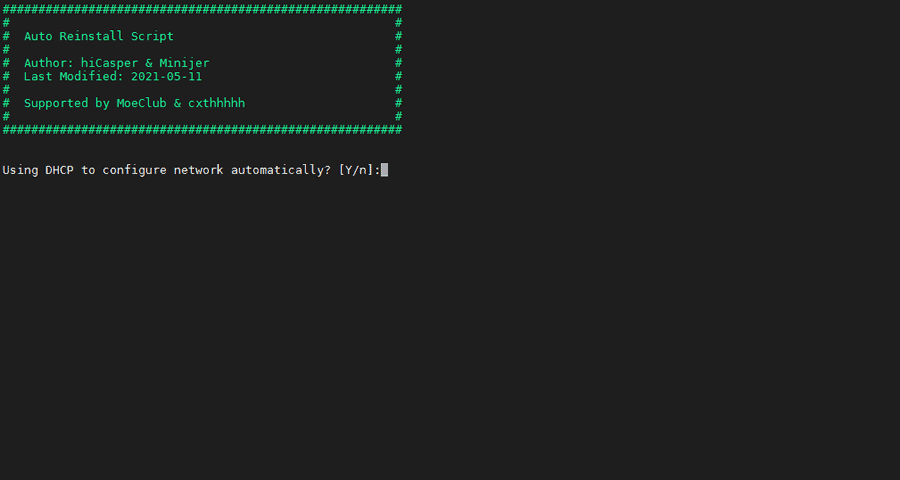
输入Y确认DD后主机自动获取IP,N则自行设置IP 输入N后会自动检测出主机现用IP,如果正确可以按Y确认使用,如不正确则按N自行按正确的输入。

25合1的系统一键DD选择界面,输入99则使用自定义镜像。 以上系统密码不为默认密码的均为网络收集,如有疑虑使用自己的自定义镜像。
41合1系统密码:
2、CentOS 7 (默认密码cxthhhhh.com)
3、CentOS 7 (支持ARM64、UEFI,默认密码cxthhhhh.com)
4、CentOS 8 (默认密码cxthhhhh.com)
5、Rocky 8 (默认密码cxthhhhh.com)
6、Rocky 8 (支持UEFI,默认密码cxthhhhh.com)
7、Rocky 8 (支持ARM64、UEFI,默认密码cxthhhhh.com)
8、CentOS 9 (默认密码cxthhhhh.com)
9、CentOS 6 (官方源原版,默认密码Minijer.com)
10、Debian 11 (官方源原版,默认密码Minijer.com)
11、Debian 10 (官方源原版,默认密码Minijer.com)
12、Debian 9 (官方源原版,默认密码Minijer.com)
13、Debian 8 (官方源原版,默认密码Minijer.com)
14、Ubuntu 20.04 (官方源原版,默认密码Minijer.com)
15、Ubuntu 18.04 (官方源原版,默认密码Minijer.com)
16、Ubuntu 16.04 (官方源原版,默认密码Minijer.com)
17、Windows Server 2022 (默认密码cxthhhhh.com)
18、Windows Server 2022 (支持UEFI,默认密码cxthhhhh.com)
19、Windows Server 2019 (默认密码cxthhhhh.com)
20、Windows Server 2016 (默认密码cxthhhhh.com)
21、Windows Server 2012 (默认密码cxthhhhh.com)
22、Windows Server 2008 (默认密码cxthhhhh.com)
23、Windows Server 2003 (默认密码cxthhhhh.com)
24、Windows 10 LTSC (默认密码Teddysun.com)
25、Windows 10 LTSC (支持UEFI,默认密码Teddysun.com)
26、Windows 7 x86 Lite (默认密码nat.ee)
27、Windows 7 x86 Lite (阿里云专用,默认密码nat.ee)
28、Windows 7 x64 Lite (默认密码nat.ee)
29、Windows 7 x64 Lite (支持UEFI,默认密码nat.ee)
30、Windows 10 LTSC Lite (默认密码nat.ee)
31、Windows 10 LTSC Lite (阿里云专用,默认密码nat.ee)
32、Windows 10 LTSC Lite (支持UEFI,默认密码nat.ee)
33、Windows Server 2003 Lite (C盘默认10G,默认密码WinSrv2003x86-Chinese)
34、Windows Server 2008 Lite (默认密码nat.ee)
35、Windows Server 2008 Lite (支持UEFI,默认密码nat.ee)
36、Windows Server 2012 Lite (默认密码nat.ee)
37、Windows Server 2012 Lite (支持UEFI,默认密码nat.ee)
38、Windows Server 2016 Lite (默认密码nat.ee)
39、Windows Server 2016 Lite (支持UEFI,默认密码nat.ee)
40、Windows Server 2022 Lite (默认密码nat.ee)
41、Windows Server 2022 Lite (支持UEFI,默认密码nat.ee)
99、自定义镜像
注意事项:
系统名称后带Lite的均为精简版,没有的是完整版.
[X64-Legacy-cxthhhhh]代表系统为AMD64位,支持传统BIOS启动,cxthhhhh定制的系统镜像.
ARM64代表系统支持ARM64位
UEFI代表系统支持最新的UEFI启动,如甲骨文全部都是这种
aliyun代表阿里云专用系统镜像
cxthhhhh、teddysun、nat.ee均为三位制作系统镜像的大佬代称
系统密码会在选择相应序号后提示,请注意记录。
经测试在谷歌云原版系统基础上DD会出现自动获取的子网掩码为255.255.255.255,如出现这种情况需要手工输入改正为正确的如255.255.255.0,否则会安装完成主机可能会离线。
阿里云因使用了特殊的驱动,DD安装Windows系统选择阿里云专用版。
Oracle Cloud(甲骨文云)可选择支持UEFI的镜像,注意基础系统最好选择Ubuntu,如原系统是CentOS可能无法成功,注意如是ARM机器注意选择同时支持ARM64和UEFI的镜像。
9-16项安装原版系统,可自定义密码,密码要求8-16位,以英文字母或数字开头,可以是大小写英文字母、数字及7个特殊字符.!$@#&%的任意组合。
[...]最近来来回回折腾了上百次服务器,每次折腾总要做一些重复的操作,挺麻烦,干脆记录一些常用操作,方便日后复制粘贴。一键网络DD脚本重装系统组件:apt-get install -y xz-utils openssl gawk file wget screen && screen -S os一键DD脚本:wget --no-check-certificate -O NewReinstal[...]
[...]最近来来回回折腾了上百次服务器,每次折腾总要做一些重复的操作,挺麻烦,干脆记录一些常用操作,方便日后复制粘贴。一键网络DD脚本重装系统组件:apt-get install -y xz-utils openssl gawk file wget screen && screen -S os一键DD脚本:wget --no-check-certificate -O NewReinstal[...]
NB
[...]3.来源 https://wiki.upx8.com/3035[...]
[...]3.来源 https://wiki.upx8.com/3035[...]
[...]三:来源 https://wiki.upx8.com/3035 [...]
[...]wget –no-check-certificate -O NewReinstall.sh https://git.io/newbetags && chmod a+x NewReinstall.sh && bash NewReinstall.sh 来源 https://wiki.upx8.com/3035[...]
有显示进度的一键dd脚本可以用了《利用可显进度的一键DD脚本1keydd安装win10(同时支持bios,uefi,支持vps,独服,计算实例)》利用可显进度的一键DD脚本1keydd安装win10(同时支持bios,uefi,支持vps,独服,计算实例) 命令:wget -qO- 1keydd.com/inst.sh|bash